Oakmont wastes no time showing its teeth. Hitting the fairway on this tight driving hole is big as you’ll be rewarded with a downslope that gives your ball some roll. The green is sloped from right-to-left and back-to-front making the long approach shot tricky. Just ask Aaron Baddeley. The 54-hole leader at the 2007 Open made a triple-bogey 7 to open his final round and was never heard from again.
Photo By: Getty Images
Hole 2 / Par 4 / 340 Yards
Just because this hole is short, doesn’t make it easy. The green has the most slope of any on the course. It’s best to play your approach from the right side of the fairway, but getting there off the tee is tough with several bunkers in play.
Photo By: Getty Images
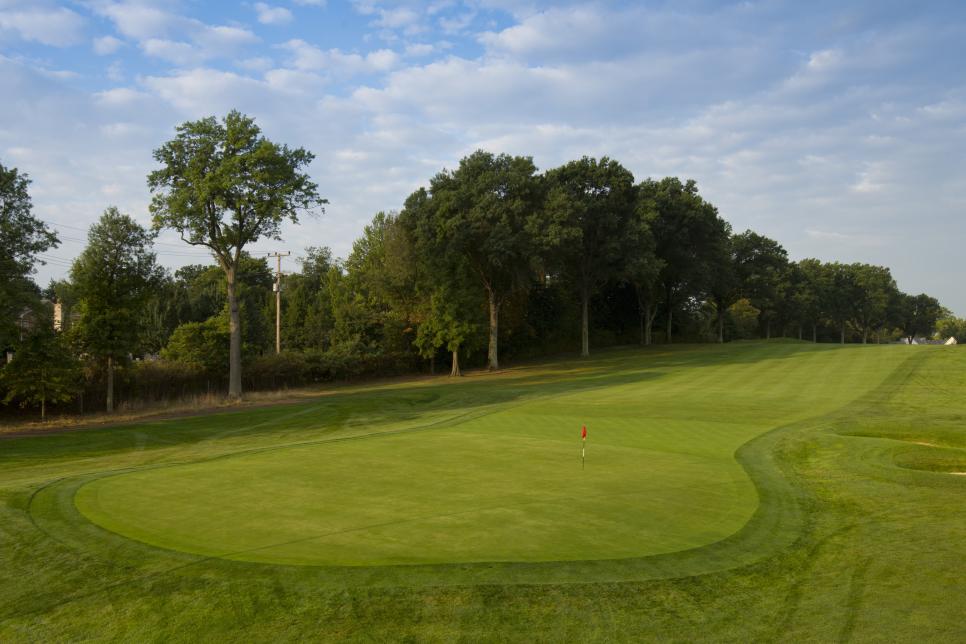
Hole 3 / Par 4 / 426 Yards
The church-pew bunker on the left side dominates the view from the tee, but the fairway here is more generous than it looks. What makes this hole tough is that its elevated green slopes front to back. Hit your approach short, and your ball could roll back down the slope 20 yards. Hit it long, and your ball might bound over into a collection area.
Photo By: Getty Images
Hole 4 / Par 5 / 609 Yards
Playing this downhill tee shot down the left side of the fairway is the safer route, but it brings the church-pew bunker in play. The right side, however is guarded by several deep bunkers that you just don’t want to be in. A small green makes trying to reach in two more risky than need be.
Photo By: Getty Images
Hole 5 / Par 4 / 382 Yards
The fairway ends less than 300 yards, so irons and hybrids are the call off the tee. The narrow green has multiple tiers that require a precision approach if you hope to steal a birdie on this short hole. This is one of the few holes that don’t allow players to hit a bump and run into the green.
Photo By: Getty Images
Hole 6 / Par 3 / 194 Yards
Bobby Jones’ worst finish in a U.S. Open was his T-11 at Oakmont in 1927, when he missed this green every round. It tilts hard right to left, so being in the right bunker makes for a very difficult up and down.
Photo By: Getty Images
Hole 7 / Par 4 / 479 Yards
The new back tee added before the Open in 2007 stretches this hole out, although the tee shot is downhill so it doesn’t demand a driver. In contrast to the previous two holes, the green slopes left to right.
Photo By: Getty Images
Hole 8 / Par 3 / 252/288 Yards
Weather permitting the USGA plans to play the hole at a little more than 300 yards at least one round. Players won’t need to hit driver as the downhill hole has a large area in front of the green that lets tee balls run to the green. The hole yielded just 18 birdies in 2007 compared to 180 bogeys, making it the fifth hardest on the course.
Photo By: Getty Images
Hole 9 / Par 4 / 477 Yards
A par 5 for members, this hole is uphill and presents a challenge even if you manage to hit the narrow fairway off the tee. The green is connected to the practice putting green, offering the unusual visual of seeing players in the background while hitting your approach shot to the hole.
Photo By: Getty Images
Hole 10 / Par 4 / 440/462 Yards
This downhill hole doesn’t look all that intimidating visually, but it played the second toughest during the 2007 Open. The right-to-left canter of the fairway makes for a tricky drive, and the approach doesn’t get any easier with the severe slope front to back of the green. It’s best to bounce the ball up to the hole rather than fly the green to take a big number out of play.
Photo By: Getty Images
Hole 11 / Par 4 / 379 Yards
Strategically, players must choose how much they want to chew off on this uphill tee shot, which leaves one of the few blind approach shots on the course. Making the decision more difficult is the drainage ditch that runs across the fairway.
Photo By: Getty Images
Hole 12 / Par 5 / 632/667 Yards
To stretch this par 5 to its max yardage, USGA officials will use the back tee on the 10th hole. Bunkers pinch the fairway near the landing zone so bombers can’t just whale away without any fear. For those in the rough off the tee, a cross bunker around 150 yards from the green makes the second shot all that more challenging. And another severely sloped front-right-to-back-left green puts a premium on your short game to walk off with a par.
Photo By: Getty Images
Hole 13 / Par 3 / 183 Yards
There’s not much to the hole, save for the fact it has one of the narrowest greens on the course. A high fade that can be held against the right-to-left tilt of the putting surface is a strong play, but don’t over do it as the deep right greenside bunker is no fun.
Photo By: Getty Images
Hole 14 / Par 4 / 358 Yards
Finally, a hole where players can think birdie. Bunkers that frame the straight fairway will keep players honest off the tee, but with the second largest green on the course, the hole tied for yielding the most birdies (85) in 2007.
Photo By: Getty Images
Hole 15 / Par 4 / 500 Yards
The downhill hole with the “mini” church-pew bunker left off the tee has the longest green of any hole at Oakmont. It’s another place where pros should take their par and walk happily to the next tee.
Photo By: Getty Images
Hole 16 / Par 3 / 231 Yards
The green is large and inviting, but severely sloped left to right, making tee-shot placement treacherous. Getting up and down from anywhere around the green is a challenge, with deep bunkers ringing the hole. In 2007, the 16th yielded only three birdies combined during the third and fourth rounds.
Photo By: Getty Images
Hole 17 / Par 4 / 313 Yards
The uphill hole is drivable for long hitters, although the narrow green is elevated and has deep bunkers protecting it. The more prudent play is an iron off the tee that will give you a wedge to the green and arguably a better chance at birdie.
Photo By: Getty Images
Hole 18 / Par 4 / 484 Yards
The tee provides a stunning view of the clubhouse at the end of the long, straight home hole. A cross bunker 90 yards short of the green becomes a factor for those who find the rough off the tee. The green’s subtle contours can provide plenty of drama. There are many who say this is best finishing hole in championship golf, and you won’t find much argument here.Oakmont Country Club: Gorilla In The Mist Hole-by-hole video flyovers: Oakmont C.C


